Create and configure a subscriber list
In Acumbamail, you can create and configure subscriber lists to receive your email campaigns. In this article, we explain how to create a subscriber list, how to import and export email addresses, and the different configuration and customization options available to you.
In this article
- Create a subscriber list
- Import subscribers to a list
- Export subscribers
- Configure a subscriber list
- Fields
- Create segments within a list
- List cleaning, Facebook audiences, and other advanced features
- View the import history of a list
- How to search and edit a specific subscriber
- How to move a subscriber from one list to another
- How to remove a subscriber from a list
- How to unsubscribe a subscriber
- Exclusion list or blacklist: how to unsubscribe an entire list
- List settings
- Merge lists
- Duplicate lists
- Remove duplicate subscribers in different lists
- Customize list notifications
Create a subscriber list
From the main Newsletters page, click on the Lists button, from there you can create and manage your subscriber lists.

Once inside, click on Create list and fill in the information requested by the form.
- You must give the list a name; this name will be public to your subscribers if they decide to modify their data at any time. However, once your list is created, in the List settings, you can determine a public name and a private name for your list.
- Similarly, your subscribers will see the email associated with the list if they decide to change their data at any given time.

You have now created your first list; you can now proceed to the next step of the tutorial, which will explain how to add subscribers to your list.
Import subscribers to a list
Once you have created a list, you can import subscribers to it by going to the lists menu, selecting the list, and clicking on the Subscribers tab.
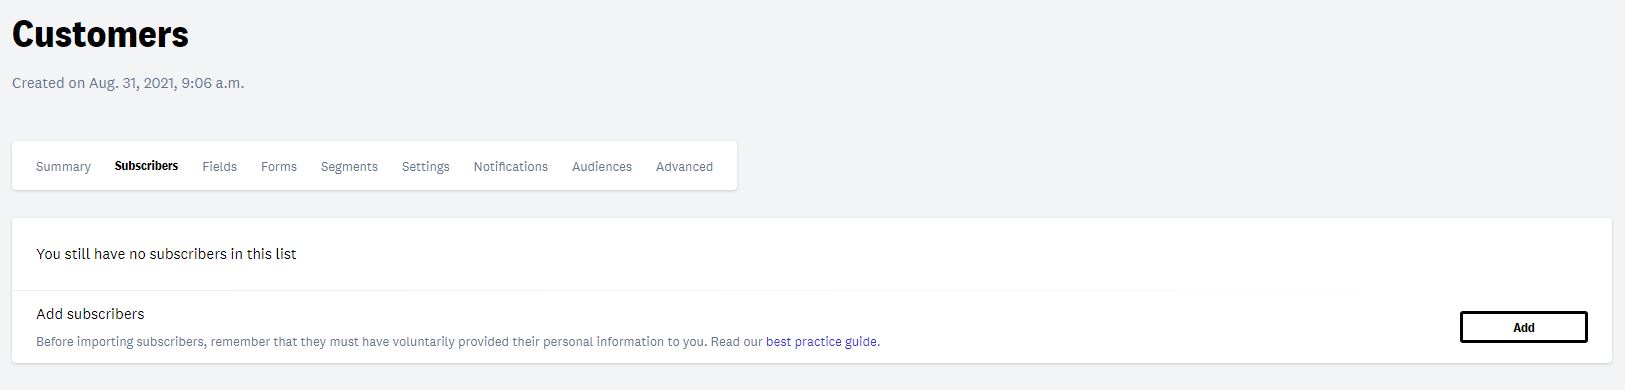
Click on the Add button, and you will see three different import options.
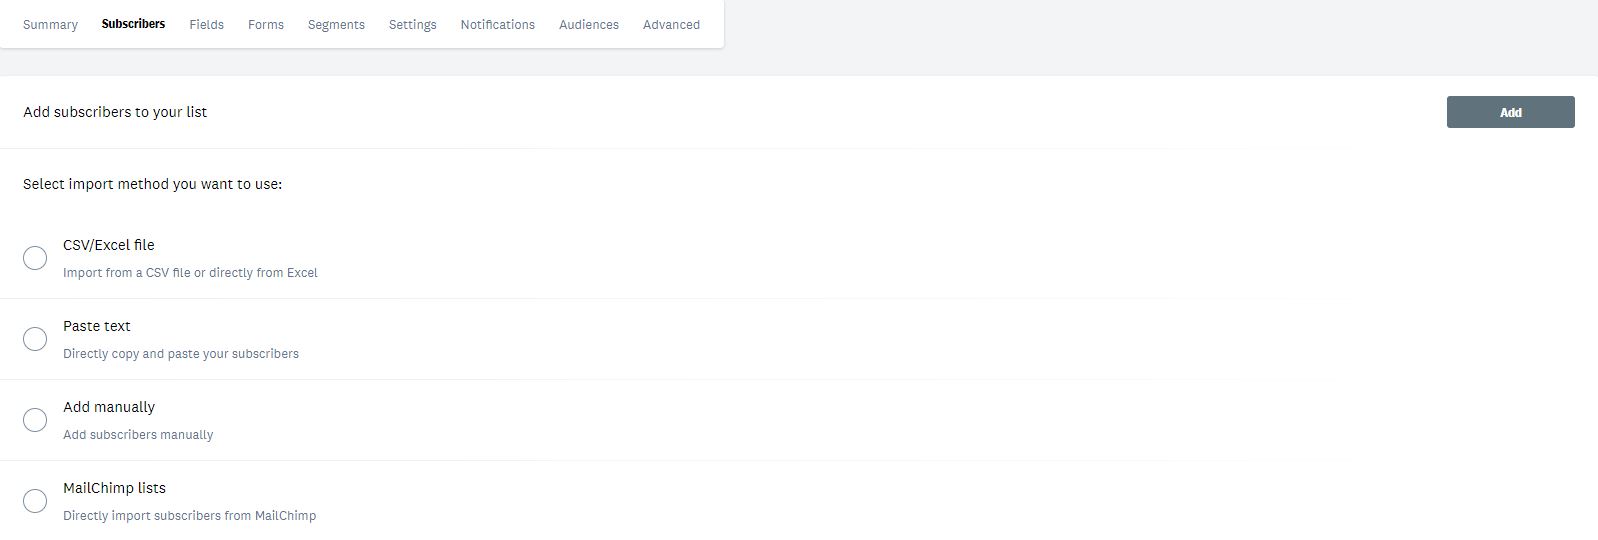
From a CSV/Excel file:
A CSV file is a text document used to represent data in table form and is the standard file type for sharing databases. In this type of file, columns are represented with commas or semicolons. Commas or semicolons delimit the fields of our list, and each row in a CSV file forms a complete record with the data of a subscriber. It is a type of file that can be easily exported from almost any format where you have your database hosted.
If your subscriber list is an Excel file, you do not need to export it as CSV, but you can upload the file directly. The steps to follow are:
- Select CSV/Excel File as the import method.
- Then, add the field separator of your file; in Excel files, it is always a semicolon (;). If your contact list has a grouping character within the same field, you will need to indicate it. Suppose that one of your fields contains a character used to separate fields, for example ",". If one of the fields contained that character, for example "1342,34", it would be taken as if it were two different fields. For this, you should create a character, for example ";", and put it before and after the value you do not want to be considered as a field separator, for example ;1342,34; If your list has a multi-option field, you should indicate the options separated by commas, so you will need to use a grouping character. For example, if the field for a subscriber should be "Option 1, Option 2", and the fields are separated by commas, you could enter it as ;Option 1, Option 2;
- Attach the file and click on Add.

- How to obtain a CSV file:

- From Google Contacts: From your contacts in Gmail: More > Export > Google CSV format (to import to a Google account)
- From Microsoft Outlook: File > Import/Export > Choose "Comma Separated Values (Windows) > Choose the list > Name the file
Once you have your well-formed CSV file, you will need to follow these steps:
- Select CSV/Excel File as the import method.
- Then, add the field separator of your file, a period or a semicolon, and the separator character between changes if there is one
- Finally, check the option The first line determines the field names if your list already includes the name of each field in the columns, for example, Name, Email...
- Attach the file and click on Add.
In some cases, the start of the import may take a few minutes, as the file is preprocessed to obtain its encoding. UTF-8 is recommended.
How to update existing subscriber data:
You can overwrite the data of your subscribers already added to a list by making a new import. The steps you need to follow are:
- Select the list where you want to modify the data
- Click on the Subscribers tab and then on the blue Add subscribers button
- Click on CSV/Excel File
- Attach your file, select the field separator and grouping character between fields if there is one
- Click on the tick Update existing subscriber data
- Perform the import by clicking on Add
Manually:
You can add subscribers one by one. To do this, you need to click on the Subscribers tab and then Enter manually. A form will appear where you can enter the subscriber's email. If you have already configured the fields for your list, you will also need to add the corresponding values for each field.

From a Mailchimp list
You can easily migrate subscribers from your MailChimp lists to Acumbamail. To do this, you only need to obtain the API Key provided by Mailchimp and then choose the list you want to import.
From a Google Sheets spreadsheet
You can easily import subscribers from your Google Sheets spreadsheets to Acumbamail. To do this, you will need to select Google Sheets as the import method.

The first time you access, a popup will automatically open for you to choose the Google account you want to link and grant the required permissions to access your spreadsheets.

Keep in mind that you can link more than one Google account. At any time, if you need to link a new account, you must click on the "Add an account" button. This will reopen the Google popup that allows you to enter your account, log in, and grant the required permissions.

Once your account is linked, you must click on the "Choose a sheet" button.

This will open a popup where all the spreadsheets located in your Google Drive will be displayed. You must select the spreadsheet from which the information will be retrieved. Remember that if the selected spreadsheet contains multiple sheets, only the information from the first one will be retrieved.

If the popup shows the following error, it will be because you have revoked the permissions previously granted to Acumbamail from your Google account here. In that case, even if your account already appears in the list of linked accounts, you must click on "Add an account" again. This way, you can grant the required permissions to perform this action again.

You will be able to see the name of the selected Google Sheet. If you wish to select a different spreadsheet, you just have to click the "Choose a sheet" button again. You cannot import from multiple sheets at once (as the column format may be different), so if you choose one spreadsheet and then choose another, the first will be replaced.

Having already selected the spreadsheet, you just need to check or uncheck the checkbox that allows you to ignore the information of duplicate subscribers (already present in the list) or take it into account to update their fields. You just need to click the "Add" button in the upper right corner to confirm the action.
Similar to other types of import methods, you will be able to choose the columns that are associated with the fields of your subscriber list. Once confirmed, the imported information will be added to your list in the form of subscribers.

Export subscribers
At certain times, it is necessary to export the subscribers we have in a list. To carry out this task, we must enter our list and click on the Subscribers tab. You can export your subscribers by status. Select from the dropdown menu the type of subscriber you want to export: active (openers + non-openers), openers, non-openers, unsubscribes, hard bounces, and complaints.
- Active subscribers: subscribers to whom you can send emails, including both openers and non-openers
- Openers: those who have opened at least one of the campaigns you have associated with that list
- Non-openers: have not opened any campaign you have associated with that list (or have not yet received any)
- Inactive subscribers: subscribers who, for various reasons, cannot receive your emails. This category includes unsubscribes, complaints, and hard bounces
Once you have selected the type of subscriber you want to export, in the button with the three ellipses, double-click on Export active (or the status you have selected).

Click on download once it is generated, and you will receive a list of subscribers in CSV format.

Configure a subscriber list
Fields
To edit the fields of our list or that will have the form that we associate with that list, you need to go to the specific list and click on the Fields tab. Click on the blue Add fields button. You can create different types of fields according to your needs:
- Text
- Checkbox: to mark, it will have a yes or no value
- List: allows different limited response options that will appear as a dropdown menu, for example: language field, options: Spanish and English. The list can allow one option or several. For this, use the switch that appears below the Options field.
- Integer
- Decimal
- Date: it is very important to follow the standard DD/MM/YY HH:MM or DD/MM/YYYY HH:MM
- Long text
-
IP


The fields of a list will allow you to customize values for each subscriber at the campaign level, both in the template or body of the message, as well as in the subject of the campaign. You will also be able to create segments within a list to target your sends.
Email marketing campaigns come with a default link for the subscriber to modify the data that appears about them in the list. Therefore, you have the option for the fields you configure to be visible and editable by the subscriber, hidden, or visible but not editable.

Create segments within a list
You can create segments (subgroups) within a list to which you can later send a campaign. To create a segment within a list, select the specific list and click on the Segments tab. Click on New segment.
You can create segments based on three parameters:
- The fields you have configured in the list
You can set one or more conditions based on the fields you have previously established in the list. The condition for creating the segment can be that all established fields are met or that at least one of them is met, and you can set it in the Send to those who meet > All or Any of menu.

-
If the field by which you want to segment your subscribers is of multi-option list type, you must ensure that the options you enter are identical to those of the subscribers. To indicate multiple options, you must enter the desired options separated by commas and use the "contains" filter.

- By subscriber behavior in the campaigns sent to that list

You can create a segment to send to a subgroup of the list based on the behavior they had with a specific campaign, for example, a segment of subscribers who did not open a campaign X. To do this, select Behavior as the condition.

- By subscriber quality
Likewise, you can create a segment within the list considering the quality from 0 to 100 of the subscriber based on the interaction they have with your sends (to learn more about email marketing and lead scoring, check our blog guide). Select Quality as the condition and set the values you want. Remember that you can combine these three types of segmentation conditions with each other.

To export a segment, click on the button with the three dots next to each one and select the Preview segment option.
List cleaning, Facebook audiences, and other advanced features
With the PRO and Enterprise plans, you will have access to premium features for list management:
- Facebook audiences to connect lists or segments to custom audiences on Facebook to create specific ads for your subscribers on Facebook and Instagram.
- Analyze the quality of a list (if there are emails included in spam traps or non-existent).
- Automatically remove subscribers who do not meet certain parameters (for example, those who have not opened a campaign in over six months) with the list optimization tool.
- Calculate the best time slot for sending emails at the account level
You can see all the advanced features included in the PRO and Enterprise plans here.
View the import history of a list
You can check the imports you have made in a list over time by accessing the specific list, clicking on the Subscribers tab, selecting the button with the three dots, and finally, View import history.

In this section, you can also see in detail the import errors that may have occurred during the process; the most common are:
- If you have a free account, you can only import a maximum of 250 subscribers across all your lists. If your list exceeds that number, the import will error out before reaching 250 imported email addresses
- If an email has already been imported previously, it will show as an error to prevent duplicates in the list
- Your row does not have a valid format or is empty
How to search and edit a specific subscriber
If you want to see the specific data of a subscriber, the campaigns they have received, and what status they have given in each of them (if the subscriber has unsubscribed, you will also be able to see in which specific campaign), you have two ways to search for it:
- Entering their full email in the search bar of the main lists menu, in Newsletters > Lists

- You will be able to see in which list or lists they are included, and if you click on their email, you will be able to see the behavior they have had with the received campaigns (if they clicked on a campaign X, if they did not open a campaign Y...)

You can also search for the specific subscriber in the list; in this case, you do not need to enter the specific email of the subscriber; just a part, like a domain @example.com. To search for it, click on the list, go to the Subscribers tab, and enter their email or a part in the search bar. By clicking on their email, you will access the history of campaigns they have received.

If you want to change the subscriber's data or download the history of campaigns they have received, click on the button with the three dots when selecting them and click on Edit or Generate details file.

How to move a subscriber from one list to another
You can move a specific subscriber from one list by following these steps:
- Go to the specific list where they are located
- Go to the Subscribers tab
- Search for the subscriber in the search bar or by status

- Select the specific subscriber by checking the box to their left
- In the dropdown menu resulting from Select an action, select Move selected and then select the list of your choice

How to remove a subscriber from a list
To remove a specific subscriber from a list (which simply does not appear in the list, it is not the same as unsubscribing), you have two ways to do it:
- From the main Lists menu within Newsletters, double-click on the specific list where the subscriber is located
- Once inside, go to the Subscribers tab
- Search for the subscriber in the search bar or by status
- Select the specific subscriber by checking the box to their left
- In the dropdown menu resulting from Select an action, click on Remove the selected

How to unsubscribe a subscriber
When you unsubscribe a subscriber, they go from being an active subscriber (who can receive your emails) to an inactive one (who remains in the list, is not deleted, but will no longer receive your emails). It is important to keep in mind that unsubscribes are global to all lists, meaning that when a subscriber is marked as unsubscribed in one list, they will automatically be unsubscribed from all lists they are included in.
To unsubscribe a specific subscriber from a list, you have two ways to do it:
- From the main Lists menu within Newsletters, double-click on the specific list where the subscriber is located
- Once inside, go to the Subscribers tab
- Search for the subscriber in the search bar or by status
- Select the specific subscriber by checking the box to their left
- In the dropdown menu resulting from Select an action, click on Unsubscribe the selected

Exclusion list or blacklist: how to unsubscribe an entire list
We have recently included the option to unsubscribe from one to all subscribers of a specific list. This option is especially useful if we want to ensure that we will not send to the subscribers of that list under any circumstances, since unsubscribes are global to all lists.
To unsubscribe an entire list, go to the main lists menu and then double-click on the button with three dots located to the right of the list you want to be an exclusion list.

Some considerations about this function:
- This process is irreversible; once you unsubscribe all subscribers included in this list, they will remain unsubscribed.
- As unsubscribes are global to all lists, if you import a subscriber included in the exclusion list to a subscriber list, the subscriber will appear as unsubscribed automatically. This way, you ensure that you will not accidentally send emails to excluded emails.
- You can only have one exclusion list per Acumbamail account.
- This option is especially useful if you have a list of unsubscribes from another email marketing platform and want Acumbamail to also register these unsubscribes to ensure that these unsubscribes will not receive your sends to comply with the GDPR.
List settings
If you want to update the general data of your list once you have created it, you can do so at any time by selecting the list you want to modify from the main lists menu, clicking on the button with the three dots, and selecting Settings.
In this section, you can change the name of the list in Acumbamail, the public name of the list (which your subscriber will see when they sign up for the list or want to modify data), the default sender of that list, and the language. You can also add other data such as the company, address, or phone number.

Merge lists
You can merge two or more lists into one. Before starting the process, keep these considerations in mind:
- The process is irreversible. Once you merge the lists, you cannot go back.
- The list(s) will automatically merge into the largest list.
To merge two or more lists into one, you must follow these steps:
- Go to the main Lists menu within the Newsletters section
- Select the lists you want to merge by checking the boxes to the left of each one
- On the right side, open the dropdown menu of Select an action and click on Merge lists
Duplicate lists
You can easily duplicate a list from the main lists menu within Newsletters.

Once inside, click on the button with the three dots located to the right of the list you want to duplicate and select Duplicate list from the dropdown menu.
Once you select this option, the process may take several minutes depending on the volume of the list. Select the name for the duplicated list and click on Accept when the popup window appears. The duplicated list will appear in the lists menu in a couple of
Remove duplicate subscribers in different lists
We have recently incorporated the option to directly remove subscribers that are duplicated in different lists. This function is especially useful if you have a plan based on the number of subscribers with unlimited sends, as in this plan, total subscribers count and not unique ones.
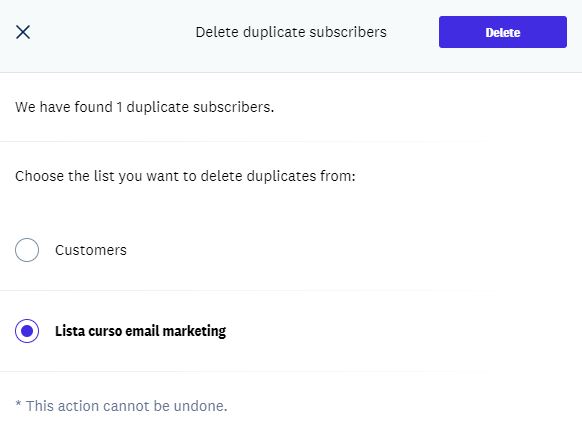
To remove duplicate subscribers, simply go to the main lists menu, select up to two lists by clicking on their boxes, and then, in the dropdown menu of Select an action click on Remove duplicate subscribers.

Some considerations to keep in mind about this function:
- Once you select the two lists where you want to check for duplicates, you will be able to see the number of duplicates and select in which list the subscribers will remain from the lists you have selected before confirming the action.
- Once you confirm the action, the process cannot be undone; that duplicate will be removed from the list or lists that you did not select. However, you can always re-import it if needed.
Customize list notifications
In Acumbamail, we have incorporated a new system so you can customize the emails and pages shown to your subscribers during the subscription and unsubscription process.
To do this, you must go to the main Lists page and select the list for which you have created the signup forms. Once there, you can access the different customization options through the Notifications section.

Customize global values
You can change the common aspects that will be shown in the confirmation email and the confirmation and unsubscription pages through the option "Global settings."
You will be able to make changes regarding the logo, text colors, content or background, as well as modify the appearance of the buttons.

Customize Confirmation Email
To modify the confirmation email, you must continue scrolling in the section until you reach the option "Confirmation Email" you can enable and disable this option whenever necessary from this section.

In it, you will be shown the available options to customize with your information; you can make the changes you need. To check how they will appear to your subscribers, press the "Preview" button, and a pop-up will open for you to check the appearance.

Don't forget to save the changes by clicking on update once you are done.
Customize Confirmation Page
To modify the confirmation page, you must continue scrolling in the section until you reach the section of "Confirmation Page". You will be able to make the changes you need. In this case, you have two options:
- Link: You can direct your subscribers to your own confirmation page; you can add your own URL in this section, you will only need to verify the domain to confirm that it is your property.
- Custom fields: You can customize your own message through the custom fields, adapting the page to your needs.

Don't forget to save the changes once you are done.
Customize Unsubscription Page
To modify the unsubscription page, you must scroll to the last section of this section; you will find the "Unsubscription Page" Once there, customizable options will be displayed such as: title, description, button text, and showing the reasons for unsubscription; by clicking on them, you can make the changes you need. Within the "Description" section, you can insert the text
If you unsubscribed by mistake, click <a id="resubs_link">here</a>
This will allow your subscribers to resubscribe in case they unsubscribed by mistake.

Don't forget to save the changes once you are done by clicking on "Update"
For practical tips on how to manage your email marketing lists, you can check our specific guide.